Our town just got its first roundabout. There is a second one opening within the next two weeks (supposedly). I have heard countless people stress out, complain, predict doom and disaster, and criticize the city over this.
It's only a roundabout, folks. It's just an intersection with a circle in the middle. They exist in every country, and so far, have not brought down the apocalypse. They are in fact safer and better at regulating traffic. Easier on your gas too, cutting down on all that stop-and-starting stop signs make you do (which in essence is better for the environment, pollution-wise).
But I understand that for those who have never used a roundabout (sometimes called a traffic circle or rotary), it can be a little intimidating. And if you are unsure of the rules of a roundabout, I can see how you might approach one with a little confusion and trepidation.
So I'm giving you five little roundabout rules and tips that will hopefully make you feel a little more confident next time you approach one.
1. Fifirst thing to realize is that roundabouts are basically the same thing as a four-way stop, only with a yield (and an island in the middle). Imagine that island as a large piece of roadkill you don't want to run over. You'd bend around it right? And that's what you do at a roundabout.
The rules of a four-way stop apply. The person who approaches from the right of you has right of way. You don't - I repeat DON'T - have to come to a full stop each time you approach. But you do have to yield if anyone else besides you is approaching or already on the roundabout.
2. Saying that, unlike a four-way stop where everyone proceeds one at a time, you can actually enter the roundabout simultaneously with someone else if they are coming the opposite direction or are far enough around the roundabout for you to SAFELY enter it too. This is why it's so effective for traffic control. If you can safely slide in without slowing anyone on the roundabout down, you may proceed.
3. This is why SIGNALLING is so important on a roundabout. Here's a breakdown of when and where to signal.
Upon approaching roundabout,
If you are going to take the first exit (on the right), signal RIGHT.
If you are going straight through the roundabout, do NOT signal at all UNTIL you have passed all the exits on the right, then signal right to indicate you are now taking the straight across exit.
If you are taking any exits in between the first right and straight on, don't signal until you have passed the last exit before your exit, then signal right to take your exit.
If you are going left (any exit past straight on), signal LEFT upon approaching the roundabout. This allows everyone else approaching from other exits to know that you are going to be passing by all of them. Keep signalling left until you approach your exit, then signal right to take your exit.
4. Roundabouts let you legally do U-turns. You can just approach the roundabout, signal left and keep signalling left until you've made your full U (then signal right to exit). You can even do a full circle if you want, but this is rarely necessary unless you missed your exit, are completely lost or have trouble making decisions and can't cope with too many choices.
5. Go slowly. Always be aware of who is entering, exiting, approaching, and already on the roundabout. Slot in where safe to do so. Stop only when you have to, otherwise, yielding is fine. Always be aware when you are approaching that someone may be about to cross in front of you, even if they are not signalling. Not everyone knows to signal and not everyone bothers to signal. Don't blindly trust other people's signalling either. Just like you wouldn't pull out in front of a car onto a street simply because they are signalling to turn (because you never know if they are actually turning until they start to), do the same with roundabouts. Roundabouts have rules, but not everyone follows them.
Hopefully, however, this little set of rules will help YOU follow and understand the rules, and maybe teach someone behind you a little about signalling, and hopefully your new roundabout will be a safe and effective traffic installment, not a disaster waiting to happen.
For more information, click on this helpful little graphic of a simple four-way roundabout from Wikipedia.
I am resisting the urge to mark this with the label 'death'.
Showing posts with label tutorial. Show all posts
Showing posts with label tutorial. Show all posts
Thursday, August 07, 2014
Monday, December 23, 2013
If I Call It a 'Tutorial' It Sounds Way More Bloggy
Ahem. A Christmas Cracker Tutorial
Don't you just want to Pin it? (No really, I think you can Pin it, there might be an option at the bottom.)
Today's Advent Activity was making Christmas crackers. For those on the monarchical side of the pond, you know exactly what these are. For the rest of you, this might be new.
Christmas crackers are an integral part of the Christmas festivities. Every family meal, office party, restaurant dinner or any other Christmas get-together involves them. They even give out Christmas crackers to the homeless at outreach services. It's, like, not Christmas without a cracker.
Since they are hard to find in the States, our elves asked us to make them ourselves. We decided to make enough for Christmas breakfast with my family on Christmas morning, so we have been collecting toilet rolls for weeks.
To make an authentic Christmas cracker, you need the following:
- Empty toilet rolls
- Some kind of wrapping paper
- Some kind of ribbon or tie
- Trinkets
- Jokes
- Paper crowns
- Cracker snaps
However, since I am never very organized and all my plans are poorly thought out, I never got around to ordering my cracker snaps this year. Note to self: Order them in January for next year.
We also didn't make paper crowns. Last year when we made these in Scotland, we made crowns out of tissue paper and tape. I don't think that requires much explanation... just make a crown however you want. Just make it adjustable and/or able to fit an adult or child's head.
Okay, so here's the 'tutorial'. That word makes me sound like such a ponce. But it's the blingo. (Blog+Lingo = That has TOTALLY gotta become a word.)
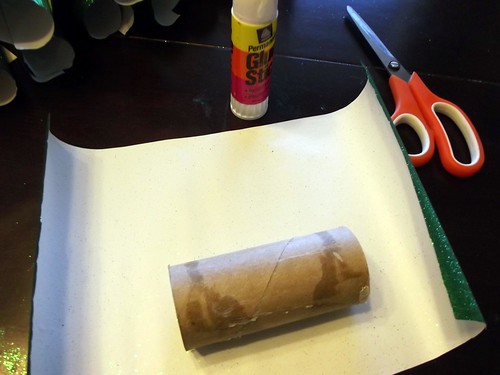
First cut out sheets of wrapping paper large enough to cover the toilet roll sideways and leave plenty of extra on the ends for pulling on. Then cover the toilet roll with glue from a glue stick.
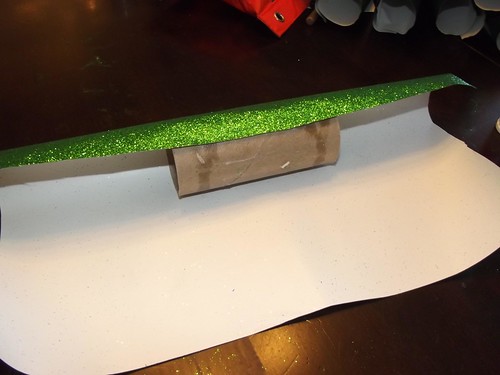
Roll the gluey toilet roll up in wrapping paper. Seal the end with more glue so the wrapping paper doesn't peel away.
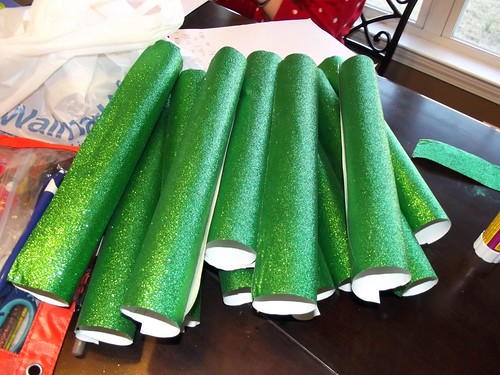
Pretty. :) (By the way, I didn't mean to get actual glittery wrapping paper. In its cellophane I thought it was just glittery looking. But no, it was actual glitter, everywhere. But it came out looking really nice.)
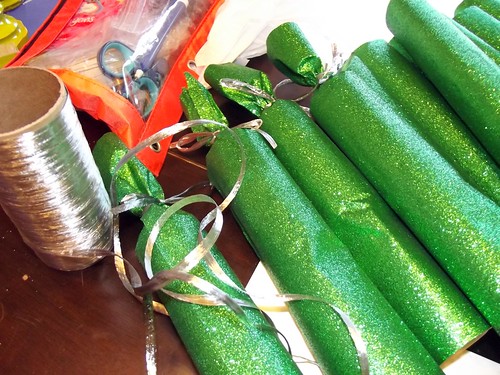
Tie up one end with some kind of ribbon. I used silver raffia. It was just right for pulling the ends tight without breaking. If you are using cracker snaps, run them through the middle of the toilet roll and make sure to tie it up on each end. These tied ends are the ends two people will pull so the snap needs to be caught in the tie so they, you know, snap.
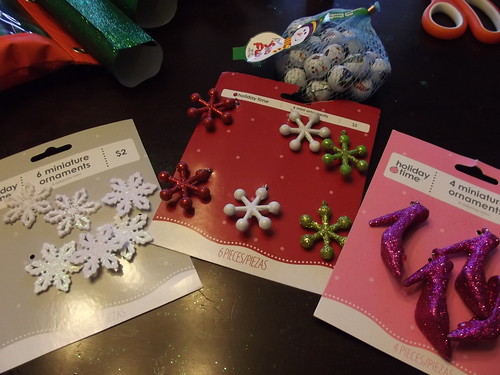
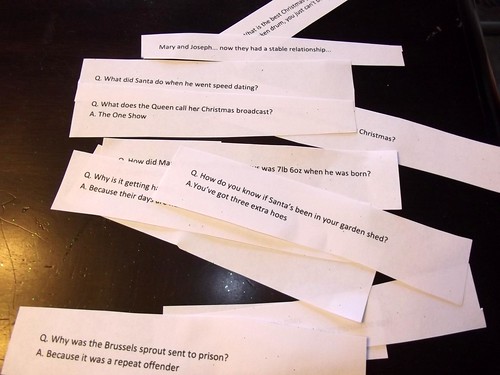
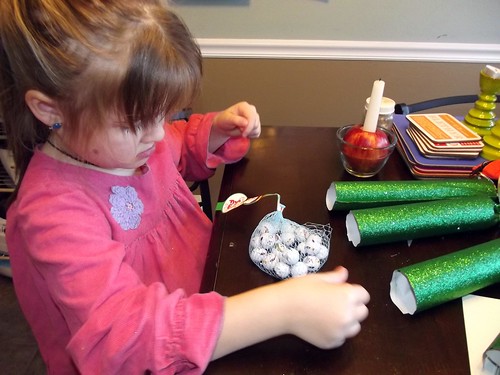
Stuff the cracker with the necessary items. We inserted jokes, a chocolate sweetie and a mini tree ornament into each. We were going to use little Christmas stocking filler things like mini keychains, pencil erasers, etc, but the Christmas party section was already cleared out today when I went to buy them. As was the majority of the whole Christmas section. Which is why I got the wrapping paper I did, come to think of it. I didn't realize waiting until the last minute around here was a bad idea. But it is. Note to self: Get all your Christmas supplies in October next year.
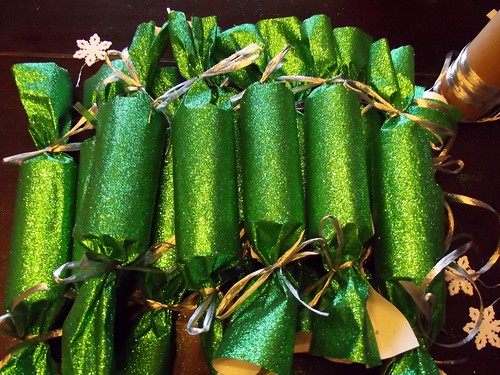
Once everything is inside, tie up the end, again, remembering to catch the snap if you are using them.
Then on Christmas day, or at your work's night out, or wherever you are going to be opening your crackers, place one cracker at each place setting. Everyone will turn to someone else to pull their crackers apart. Whoever ends up with the cracker part and not just an end gets to keep what's inside. Don't forget to put on your crown and read your joke. (The cornier, the better!)
Merry Christmas!
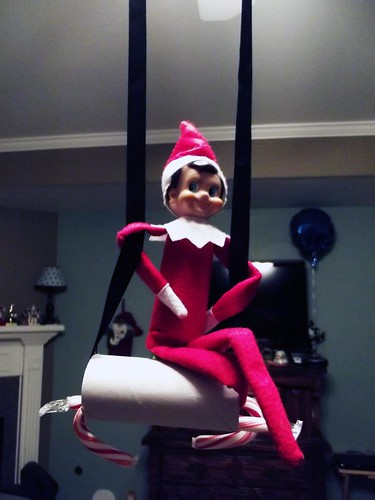
(Oh yeah, and speaking of toilet roll, it seemed Banoffee got in on the toilet roll action himself last night. He made himself a little swing hanging from the pulleys on the ceiling fan. Of course this morning Lolly knocked him off by trying to swing him really fast and really high.)
Don't you just want to Pin it? (No really, I think you can Pin it, there might be an option at the bottom.)
Today's Advent Activity was making Christmas crackers. For those on the monarchical side of the pond, you know exactly what these are. For the rest of you, this might be new.
Christmas crackers are an integral part of the Christmas festivities. Every family meal, office party, restaurant dinner or any other Christmas get-together involves them. They even give out Christmas crackers to the homeless at outreach services. It's, like, not Christmas without a cracker.
Since they are hard to find in the States, our elves asked us to make them ourselves. We decided to make enough for Christmas breakfast with my family on Christmas morning, so we have been collecting toilet rolls for weeks.
To make an authentic Christmas cracker, you need the following:
- Empty toilet rolls
- Some kind of wrapping paper
- Some kind of ribbon or tie
- Trinkets
- Jokes
- Paper crowns
- Cracker snaps
However, since I am never very organized and all my plans are poorly thought out, I never got around to ordering my cracker snaps this year. Note to self: Order them in January for next year.
We also didn't make paper crowns. Last year when we made these in Scotland, we made crowns out of tissue paper and tape. I don't think that requires much explanation... just make a crown however you want. Just make it adjustable and/or able to fit an adult or child's head.
Okay, so here's the 'tutorial'. That word makes me sound like such a ponce. But it's the blingo. (Blog+Lingo = That has TOTALLY gotta become a word.)

First cut out sheets of wrapping paper large enough to cover the toilet roll sideways and leave plenty of extra on the ends for pulling on. Then cover the toilet roll with glue from a glue stick.

Roll the gluey toilet roll up in wrapping paper. Seal the end with more glue so the wrapping paper doesn't peel away.

Pretty. :) (By the way, I didn't mean to get actual glittery wrapping paper. In its cellophane I thought it was just glittery looking. But no, it was actual glitter, everywhere. But it came out looking really nice.)

Tie up one end with some kind of ribbon. I used silver raffia. It was just right for pulling the ends tight without breaking. If you are using cracker snaps, run them through the middle of the toilet roll and make sure to tie it up on each end. These tied ends are the ends two people will pull so the snap needs to be caught in the tie so they, you know, snap.


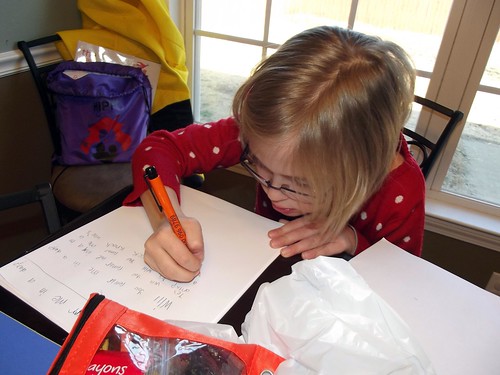 |
| Fifi hand wrote some jokes herself. |

Stuff the cracker with the necessary items. We inserted jokes, a chocolate sweetie and a mini tree ornament into each. We were going to use little Christmas stocking filler things like mini keychains, pencil erasers, etc, but the Christmas party section was already cleared out today when I went to buy them. As was the majority of the whole Christmas section. Which is why I got the wrapping paper I did, come to think of it. I didn't realize waiting until the last minute around here was a bad idea. But it is. Note to self: Get all your Christmas supplies in October next year.

Once everything is inside, tie up the end, again, remembering to catch the snap if you are using them.
Then on Christmas day, or at your work's night out, or wherever you are going to be opening your crackers, place one cracker at each place setting. Everyone will turn to someone else to pull their crackers apart. Whoever ends up with the cracker part and not just an end gets to keep what's inside. Don't forget to put on your crown and read your joke. (The cornier, the better!)
Merry Christmas!
(Oh yeah, and speaking of toilet roll, it seemed Banoffee got in on the toilet roll action himself last night. He made himself a little swing hanging from the pulleys on the ceiling fan. Of course this morning Lolly knocked him off by trying to swing him really fast and really high.)

Sunday, January 13, 2013
Top 3 Favourite YouTube Videos
For the Ultimate Blog Challenge today, there was a list of 50 suggested blog titles to work from. Most were much more creative (like What My Popcorn Maker Taught Me About Demand in Business), but it's early, it's Sunday, and I'm tired.
So after a lot of thought, here's what I've decided are my top 3 favourite YouTube videos. They are all very different: an amateur music video, a hilarious meme poking fun at us 'natural mamas' and an unbelievably cool costume make-up tutorial. Enjoy any or all of them!
Saskia Hamilton
Sh*t Crunchy Mamas Say
Pop Art/ Comic Book Make-Up Tutorial
*****
Ooh and just as a bonus, I forgot about this one. Just recently saw it, but it is WORTH WATCHING.
Pilobolus' Shadowland
Sunday, April 15, 2012
Project: Nesting
I am well and truly in the 'nesting phase' of my pregnancy. I've been doing all kinds of ridiculous things, like ironing (what?!), dusting, sorting and most recently, crafting. I have a few projects I want to complete, and I am starting to actually get around to them.
One thing I've been meaning to do is cover some bulletin/cork boards with fabric for the kids' room. I found this tutorial online and last night I finally got around to doing it.
I had three boards, one for each child, to put their special achievements and artwork on. They started out as simple boards from Tesco.
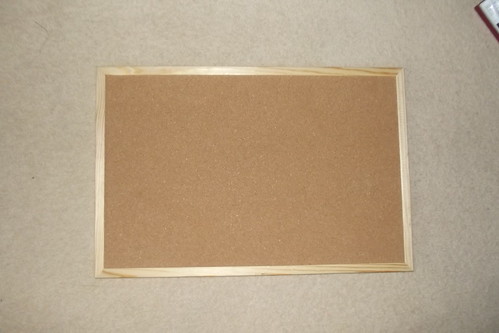
Then I painted the frames in the colours that I will be trying to limit their room to.
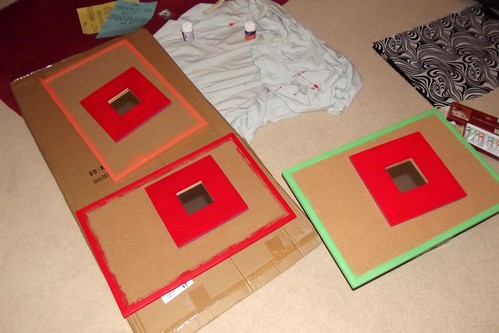
As for the fabric, I was torn as to which way to go. I could either keep their room in the black and white with some red and orange (and now some green for baby boy), or go all colourful. It was a tough decision, especially after Fifi said she only liked the colourful ones and was not going to like the black and white.
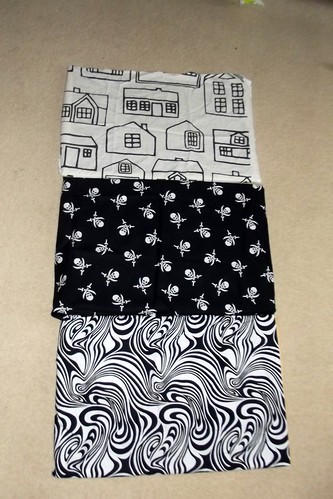
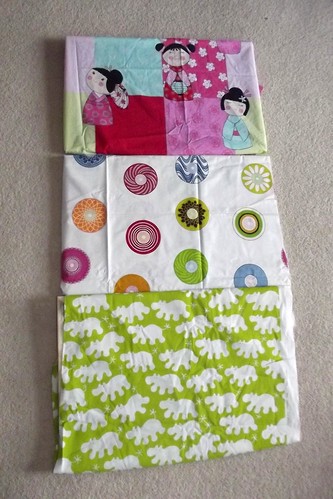
Well, Fifi lost. They already have a black and white zebra bedspread (with green sheets) and a black toy cupboard, and their bed frame is black. The bunk bed has a solid red tent over it and a red and orange bedspread, and there are several red photo frames already in the room. And the curtains I've picked out to replace their pink ones are red. So I decided to stick with the black and white theme with the tri-colour accents.
So I dressed the frames with the fabric and tried to cut the fabric with a rotary cutter I have had for years and never used.
There is a reason a klutz like me should not use rotary cutters. I sliced my finger open on it. Luckily I didn't bleed all over the fabric... although the red would've matched! I also made a huge mess of the edges. The tutorial suggests ribbon trimming, but I hadn't intended to bother; now I had no choice. I scoured the house looking for strips of ribbon long enough to frame the boards, and all I found were lace - fine for the girls but not the boy - and some black and white tartan. So I ended up trimming the boards after all. The old-fashioned lace was a bit funny looking on top of the modern prints, so I double lined them with the tartan on top of the lace and somehow the odd mix of modern fabric, old yellowed lace and tartan ribbon ended up working. Thank goodness I went with the black and white look!
Here is my finished product.
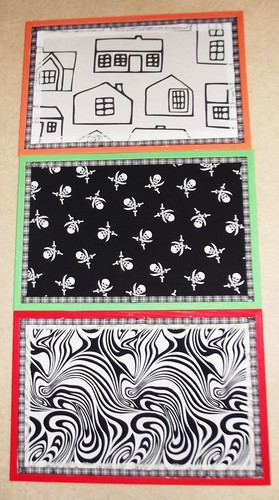
I was very pleased with the outcome but wasn't sure how the kids, particularly Fifi, would react. I had decided ahead of time not to let Fifi be a madam about it. But when she came in this morning and saw them, she gasped and said, "Oh! I didn't expect them to be THAT nice!" She loves hers. (Hers is the swirly one.)
****
Furthermore, while I had the paints out last night, I decided to get a few other minor projects sorted. I had painted the kids' IKEA chairs orange about a year ago, but they had by this time been scuffed, scraped and drawn all over with an ink pen. So I repainted the chairs. I had also painted some IKEA mirrors pink back when Fifi was a baby to match her then pink and green bedroom. Since I'm trying to de-girlify the room to make space for our little man, I repainted these as well.
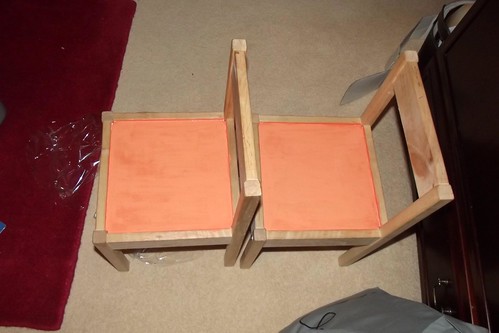
(Paint still drying in this photo. It didn't dry splotchy like it looks here.)
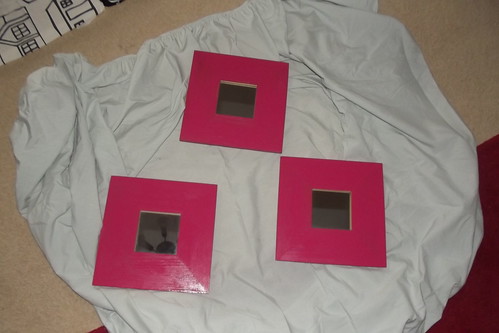
From this...

...to this.
All in all, a very productive night, considering I also ironed all of Scott's shirts for the week (by gum, I even used the spray starch!), folded and put away two loads of laundry, cleaned and hoovered the living room and baked a chocolate cake. The only thing I didn't get around to was that last load of laundry hanging on the pulley and putting new glass in a broken frame. I will do those tonight... I might even repaint the frame before putting new glass in it! Yes, I think I will do that.
One thing I've been meaning to do is cover some bulletin/cork boards with fabric for the kids' room. I found this tutorial online and last night I finally got around to doing it.
I had three boards, one for each child, to put their special achievements and artwork on. They started out as simple boards from Tesco.

Then I painted the frames in the colours that I will be trying to limit their room to.

As for the fabric, I was torn as to which way to go. I could either keep their room in the black and white with some red and orange (and now some green for baby boy), or go all colourful. It was a tough decision, especially after Fifi said she only liked the colourful ones and was not going to like the black and white.


Well, Fifi lost. They already have a black and white zebra bedspread (with green sheets) and a black toy cupboard, and their bed frame is black. The bunk bed has a solid red tent over it and a red and orange bedspread, and there are several red photo frames already in the room. And the curtains I've picked out to replace their pink ones are red. So I decided to stick with the black and white theme with the tri-colour accents.
So I dressed the frames with the fabric and tried to cut the fabric with a rotary cutter I have had for years and never used.
There is a reason a klutz like me should not use rotary cutters. I sliced my finger open on it. Luckily I didn't bleed all over the fabric... although the red would've matched! I also made a huge mess of the edges. The tutorial suggests ribbon trimming, but I hadn't intended to bother; now I had no choice. I scoured the house looking for strips of ribbon long enough to frame the boards, and all I found were lace - fine for the girls but not the boy - and some black and white tartan. So I ended up trimming the boards after all. The old-fashioned lace was a bit funny looking on top of the modern prints, so I double lined them with the tartan on top of the lace and somehow the odd mix of modern fabric, old yellowed lace and tartan ribbon ended up working. Thank goodness I went with the black and white look!
Here is my finished product.

I was very pleased with the outcome but wasn't sure how the kids, particularly Fifi, would react. I had decided ahead of time not to let Fifi be a madam about it. But when she came in this morning and saw them, she gasped and said, "Oh! I didn't expect them to be THAT nice!" She loves hers. (Hers is the swirly one.)
****
Furthermore, while I had the paints out last night, I decided to get a few other minor projects sorted. I had painted the kids' IKEA chairs orange about a year ago, but they had by this time been scuffed, scraped and drawn all over with an ink pen. So I repainted the chairs. I had also painted some IKEA mirrors pink back when Fifi was a baby to match her then pink and green bedroom. Since I'm trying to de-girlify the room to make space for our little man, I repainted these as well.

(Paint still drying in this photo. It didn't dry splotchy like it looks here.)

From this...

...to this.
All in all, a very productive night, considering I also ironed all of Scott's shirts for the week (by gum, I even used the spray starch!), folded and put away two loads of laundry, cleaned and hoovered the living room and baked a chocolate cake. The only thing I didn't get around to was that last load of laundry hanging on the pulley and putting new glass in a broken frame. I will do those tonight... I might even repaint the frame before putting new glass in it! Yes, I think I will do that.
Sunday, October 26, 2008
Sewing Patterns
There's a sewing blog I read, called rostitchery that is full of interesting pattern tips and tutorials. I clicked on a link from her blog, and I found the most amazing programme:
Wild Things!
It's a free downloadable programme that gives you patterns to all kinds of accessories, like hats, slippers, bags and wraps. It's amazing!
There are a few other things on the site that I'd totally purchase if a) I had more money and b) I had more time to sew, but I'm definitely keeping this in my favourites for that wonderful someday when I can just stay at home and 'arts and crafts' it up all day long.
(Speaking of arts and crafts, I went to a craft fair yesterday and came home with some real cardmaking goodies, like this, this and this. Fun day!)
Subscribe to:
Posts (Atom)
